What and why
In addition of being a great tool for building cloud services and such, C# shines, perhaps surprisingly, in video game development. Unity game engine, for example, uses C# as a scripting language. For my taste, however, Unity is a little bit too magical, too much of mouse dragging and button clicking in order to get something workable. So for this guide we will use Monogame, a wonderful cross-platform C# framework for building games which can run on Windows, Mac, Linux, as well as on a few popular mobile platforms and game consoles. We are going to concentrate on building a desktop game. This will be a Tetris-like game and it will be able to run on any popular desktop platform.
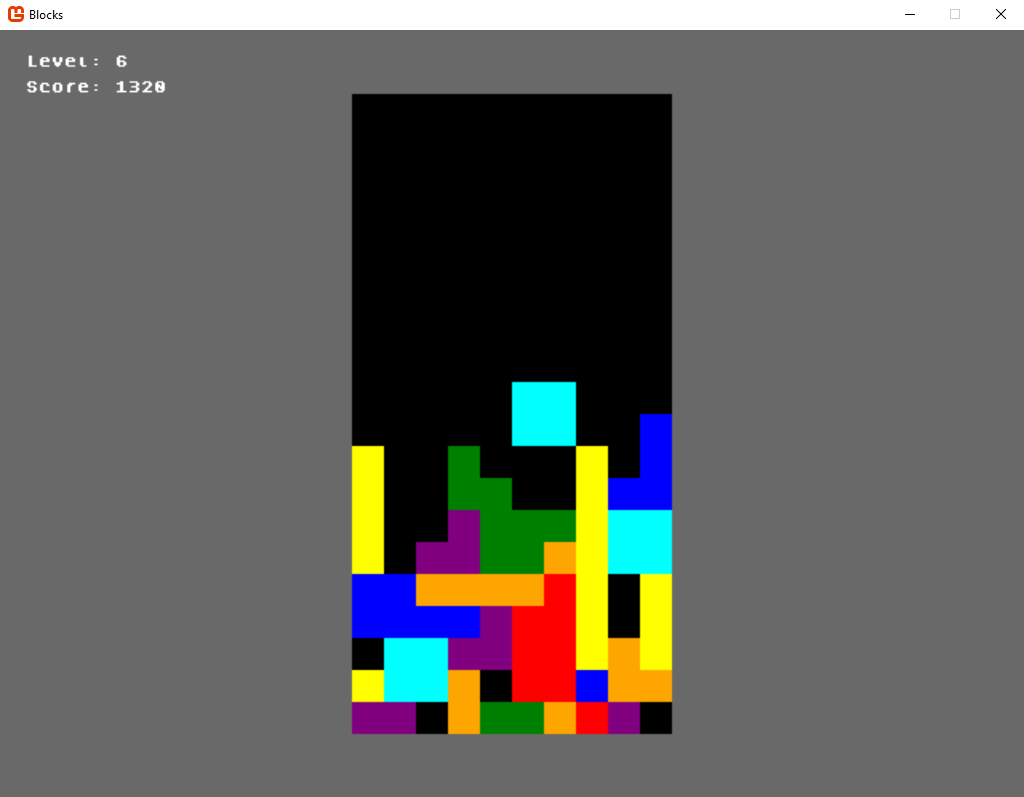
We are going to build something like this:
Ultra-brief history of Monogame
Around 15 years ago, Microsoft toyed with the idea of making game development accessible to the hobbyists and indie developers alike so they released set of libraries and tools called Microsoft XNA, aimed at the cross-platform game development. Of course, the term “cross-platform” was understood in the traditional Microsoft’s way, i.e. Windows and Xbox. The toolkit was actually pretty well received by the indie games developers community. But, as it often happens with them, Microsoft eventually lost interest and pretty much abandoned the project. The open source community stepped in, and reimplemented the XNA Api as an open source project, which got a name Monogame. Since then the support for many platforms has been added and currently one may use it to develop games for macOS, Linux, Windows, iOS, Android and a few game console platforms, like Nintendo Switch. Monogame powers quite a few popular video games, Stardew Valley being one such example.
What you need to follow along
You’ll need a .net SDK installed on Windows, Mac or Linux. We are going to use the latest version which is 5.0. You will also need a code editor, something like Visual Studio Code although any other editor will work too. Familiarity with the terminal and the basics of C# is assumed. For uniformity, I am going to use bash. On Windows you may use git bash but it is pretty trivial to port commands to the standard Windows cmd.exe.
Initial setup
Create a directory and create a new console project
mkdir csharp_game
cd csharp_game
dotnet new console
It is probably just me, but I dislike, for some reason, the name for the default class to be Program.
So let’s rename it
mv Program.cs App.cs
You may also want to open the App.cs file and rename the class name as well. While you are it, make sure that the namespace is called Blocks.
Create the game window
First, we need to add the monogame package to our project.
dotnet add package MonoGame.Framework.DesktopGL
Notice that we are using the OpenGL flavor of Monogame. There are other flavors too, but this one will work on Windows, Mac and Linux.
In Monogame, your window class must derive from the Game class which lives in the Microsoft.Xna.Framework.Graphics namespace, so make your App class to derive from it, and don’t forget to add the appropriate using statement.
Create a constructor for the App class which initializes the Monogame GraphicsManager, like so:
using Microsoft.Xna.Framework;

namespace Blocks
{
    class App : Game
    {
        private readonly GraphicsDeviceManager graphics;
        public App()
        {
            graphics = new GraphicsDeviceManager(this);
        }
    }
}
Monogame will call the virtual method Draw in your game class when it is a time to show your game to the screen.
For now, we are going to clear the whole window to a nice Gray color
protected override void Draw(GameTime gameTime)
{
    GraphicsDevice.Clear(Color.DimGray);
}
Finally, make change to the Main function so your game actually runs
public static void Main()
{
    using var app = new App();
    app.Run();
}
For convenience, here’s the whole App.cs file as of now:
using Microsoft.Xna.Framework;

namespace Blocks
{
    class App : Game
    {
        private readonly GraphicsDeviceManager graphics;

        public App()
        {
            graphics = new GraphicsDeviceManager(this);
        }

        protected override void Draw(GameTime gameTime)
        {
            GraphicsDevice.Clear(Color.DimGray);
        }

        public static void Main()
        {
            using var app = new App();
            app.Run();
        }
    }
}
Give it a spin
dotnet run
You should see a window filled with the gray color.
Draw something
Monogame usually expects you to provide images (sprites etc) to be displayed as graphical assets in your game. There is a quite sophisticated pre-processing pipeline built-in into the framework which convert png or jpg images into the format expected by Monogame. The bad news is that, as at the moment of writing this, the content processing pipeline has not been yet ported to .net 5.0. It works fine with .net core 3.1. The good news though, that all we need to display are pretty much rectangles of various colors.
Here’s a little trick: the image of 1 pixel wide and 1 pixel tall is, technically, a rectangle, albeit a small one. Monogame has the ability to scale the images arbitrarily, so 1 pixel can be scaled to the rectangle of desired size. Ok, what about the color?. In addition to scaling the image, Monogame can also tint it to any desired color. So, if we would have a 1x1 image of a white pixel, that would be enough to produce a rectangle of any size and any color.
Creating such image programmatically is not that hard in Monogame.
Create a field in the App class which will represent our pixel. Also, expose it as a property.
private Texture2D pixel;

public Texture2D Pixel
{
    get => pixel;
}
Texture2D is the Monogame object representing images, sprites etc. It lives in the Microsoft.Xna.Framework.Graphics namespace.
The actual creation of our pixel texture can be done in the Initialize call, when all graphics plumbing setup has been completed by the Monogame
protected override void Initialize()
{
    base.Initialize();
    pixel = new Texture2D(GraphicsDevice, 1, 1);
    pixel.SetData<Color>(new[] { Color.White });
}
Ok, we got our pixel.
We will want to access this Pixel property from anywhere in the program and, eventually, we’ll want also access from everywhere our class App itself. So let’s turn it into a simple singleton.
//...
class App: Game
{
// ...
//new
private static App instance;

    public static App Instance
    {
        get => instance;
    }

    public App()
    {
        // ...
        // new
        instance = this;

    }
}
//...
class App: Game
{
// ...
//new
private SpriteBatch spriteBatch;
// ...
protected override void Initialize()
{
    protected override void Initialize()
    {
        base.Initialize();
        pixel = new Texture2D(GraphicsDevice, 1, 1);
        pixel.SetData<Color>(new[] { Color.White });
        // new
        spriteBatch = new SpriteBatch(GraphicsDevice);
    }
}
In order to not pollute the App class we are going to create a separate class that holds the main game flow. Create a new file
touch PlayScene.cs
Make it look like this:
using Microsoft.Xna.Framework;
using Microsoft.Xna.Framework.Graphics;

namespace Blocks
{

    public class PlayScene
    {
        public void Render(SpriteBatch spriteBatch)
        {
            spriteBatch.Draw(
                App.Instance.Pixel,
                new Rectangle(100, 100, 100, 100),
                Color.Red
            );
        }
    }
}
The Render method of the scene uses the SpriteBatch to draw our pixel.
Draw has many overloads, this particular, in addition of having the source texture parameter (our 1x1 white pixel), also takes the destination rectangle and the tint into which to color the texture. So the pixel is scaled to a 100x100 rectangle and colored red.
Ok, now we need to add the PlayScene object to the App and call its Render in the `Draw implementation.
Add a new field:
// ...
public class App: Game
{
    //...
    // new
    private readonly PlayScene scene = new();
    // ...
    protected override void Draw(GameTime gameTime)
    {
        GraphicsDevice.Clear(Color.DimGray);
        // new
        spriteBatch.Begin();
        scene.Render(spriteBatch);
        spriteBatch.End();
    }
}
Note that the call to scene’s Render is sandwiched between Begin and End on the SpriteBatch.
Try to run the application, you will see a red square on the gray background.
Windowing
Monogame allows you to run your game in fullscreen mode, or in the window. In our case we are going to run it in the window. We set it to some initial size and let the user resize the window if he/she wants.
First create the file Constants.cs where we are going to keep all our constants, so we can find and modify them easily.
namespace Blocks
{
    public static class Constants
    {
        public const int WINDOW_WIDTH = 1024;
        public const int WINDOW_HEIGHT = 768;
    }
}
Next, in your main file, App.cs, inside the Initialize method add the following:
protected override void Initialize()
{
    base.Initialize();
    // new
    graphics.PreferredBackBufferWidth = WINDOW_WIDTH;
    graphics.PreferredBackBufferHeight = WINDOW_HEIGHT;
    graphics.ApplyChanges();
    Window.Title = "Blocks";
    Window.AllowUserResizing = true;
    // as before, create pixel and spriteBatch...
}
In order for these constants to be accessible in the file, make sure you add
using static Blocks.Constants;
on top of it.
We are setting the window dimensions here as well as its title and allowing the user to resize the window. Try to run the application, the red square on the gray background still appears. Now it is possible to change the window size and the content becomes “responsive”, that is it adapts to the window size. This is fine but it is going to be a little hard to position our content, as the user can change the the window dimensions and its aspect ratio. We can make our life a little easier by using virtual dimensions.
Drawing in terms of the Virtual Dimensions.
Let’s say, we want to treat our window as always having a predefined fixed size,
say 640x480, position all elements according to this size, and let Monogame scale it appropriately.
That is, it might be resized by the user, but we always think that the size is fixed and let Monogame to take care of appropriate scaling
Add these two constants to the Constants.cs
public const int VIRTUAL_WIDTH = 640;
public const int VIRTUAL_HEIGHT = 480;
So how we are going to take advantage of the Monogame auto-scaling? The answer is so called RenderTarget.
We basically say, hey, do all the drawing to this RenderTarget which happens to be of the size 640x480, and once all drawing done, blast the whole contents of the RenderTarget to whatever current windows size it is now.
Add the following field to the App class
private RenderTarget2D target;
create this objects at the bottom of the Initialize method
target = new RenderTarget2D(
    GraphicsDevice,
    VIRTUAL_WIDTH,
    VIRTUAL_HEIGHT,
    false,
    SurfaceFormat.Color,
    DepthFormat.None, GraphicsDevice.PresentationParameters.MultiSampleCount,
    RenderTargetUsage.DiscardContents
    );
Notice that we are passing the VIRTUAL_WIDTH and VIRTUAL_HEIGHT parameters which set the dimensions of the target.
Next, we need to make the the Draw method to look like this
protected override void Draw(GameTime gameTime)
{

    graphics.GraphicsDevice.SetRenderTarget(target);
    GraphicsDevice.Clear(Color.DimGray);
    spriteBatch.Begin();
    scene.Render(spriteBatch);
    spriteBatch.End();
    graphics.GraphicsDevice.SetRenderTarget(null);
    spriteBatch.Begin(SpriteSortMode.Immediate, BlendState.Opaque);
    var dst = new Rectangle(0, 0, Window.ClientBounds.Width, Window.ClientBounds.Height);
    spriteBatch.Draw(target, dst, Color.White);
    spriteBatch.End();
}
This code does what has been described above: we set the render target, do the clearing and drawing to that target, set the target to default, and blast the whole target into the window, which current dimensions are held in Window.ClientBounds.
if we run the application again, we’ll see that the red square still shows up, but its dimensions might be slightly different than before, as its coordinates are interpreted in the terms of the virtual coordinates. Ok, by now we can draw rectangles and have adequate control how to position them.
Arrays
I bet you have played a Tetris-like game before, so I won’t bother to specify the rules in detail. You have a rectangular board, and a falling piece which could be also viewed as 4x4 square; with some cells filled and some not. We are going to use two-dimensional arrays to represent both the board and the falling piece. The values equal to 0 in array means that the particular cell is empty, non zero value stands for the occupied cell. In theory, we could use a standard C# array structure for it, but eventually we are going to have bunch of helper methods and properties so, in order to keep the code organized, let’s create the class Arr in the file Arr.cs that is going to represent the array we need.
namespace Blocks
{
    public class Arr
    {
        private readonly int[] buf;
        private readonly int rows;
        private readonly int cols;

         public int Rows
        {
            get => rows;
        }

        public int Cols
        {
            get => cols;
        }
    }
}
the data itself is going to be kept in a simple, one-dimensional array, so we need some helper indexer which gets and sets the value, given the row and the column.
Add this indexer to the Arr class.
public int this[int r, int c]
{
    get => buf[cols * r + c];
    set => buf[cols * r + c] = value;
}
We also need to construct somehow instances of the Arr class. Let’s add two constructors, one would initialize an array filled with zeros by simply specifying number or rows and cols. Another constructor will just take the copy of the given array and represents it in a rectangular way.
These are the constructors
public Arr(int rows, int cols)
        {
            this.rows = rows;
            this.cols = cols;
            buf = new int[this.rows * this.cols];
        }

        public Arr(int[] source, int rows)
        {
            this.rows = rows;
            cols = source.Length / this.rows;
            buf = new int[this.rows * cols];
            source.CopyTo(buf, 0);
        }
Ok, that is enough for now, we will add extra functionality to this class Later.
Typically, the game board is a 10x20 rectangle, but to make things simpler to manage, we will add extra 2 row at the top, therefore internally the board will be represented as an 10x22 Arr. The 2 extra rows are not going to be visible to the user.
Add the following constants to the Constants class.
public const int BOARD_COLS = 10;
public const int BOARD_ROWS = 22;
public const int OVERFLOW = 2;
public const int CELL = 20;
CELL is the size of a simple cell of the board, in (virtual) pixels.
Engine
We could put all game logic into the PlayScene, but that quickly turn into quite unmanageable amount of code. So, in order to keep concerns separate we are going to keep the game engine in a separate class. Start with the Following Engine.cs
using static Blocks.Constants;

namespace Blocks
{

    public class Engine
    {
        private Arr board = new(BOARD_ROWS, BOARD_COLS);
        public Arr Board
        {
            get => board;
        }
    }
Nothing special. the initial board is just an empty 22x10 array.
Let’s instantiate it in the PlayScene and display on screen. Add the following to the PlayScene
private Engine engine;

private void Reset()
{
engine = new();
}

public PlayScene()
{
Reset();
}
We have the Reset method whose responsibility is to ensure the scene into the fresh, ready to play state. For now, it does not do much, as you see. The constructor simply calls the Reset.
Let’s draw the board, empty for now.
Replace the ‘Render` method with
public void Render(SpriteBatch spriteBatch)
{
    var sx = (VIRTUAL_WIDTH - CELL * BOARD_COLS) / 2;
    var sy = (VIRTUAL_HEIGHT - CELL * (BOARD_ROWS - OVERFLOW)) / 2;
    for (int r = OVERFLOW; r < BOARD_ROWS; r++)
    {
        for (int c = 0; c < BOARD_COLS; c++)
        {
            var rc = new Rectangle(
                sx + c * CELL,
                sy + (r - OVERFLOW) * CELL,
                CELL,
                CELL
            );
            spriteBatch.Draw(App.Instance.Pixel, rc, Color.Black);
        }
    }
}
We want our board to be centered, for that we compute where it starts, thus variables sx and sy. Next we go over the whole board, row by row and cell by cell, calculate what is cell’s destination place (variable rc), and draw there a black square.
Observe that we are skipping extra two rows (OVERFLOW)
If we run the application now, we are going to see an empty board displayed. Clearly we need actual game pieces.
Pieces
We are going to handle falling pieces of 7 classical shapes, As discussed previously, we represent each as an instance of 4x4 Arr, value 0 represents empty cell. If it is not 0, we will interpret it as a color index in some palette.
So create a file Pieces.cs with the following.
namespace Blocks
{
    public static class Pieces
    {
        private static readonly Arr pieceO = new(new[] {
            0, 0, 0, 0,
            0, 1, 1, 0,
            0, 1, 1, 0,
            0, 0, 0, 0,
        }, 4);
        private static readonly Arr pieceI = new(new[] {
            0, 0, 0, 0,
            0, 0, 0, 0,
            2, 2, 2, 2,
            0, 0, 0, 0,
        }, 4);
        private static readonly Arr pieceT = new(new[] {
            0, 0, 0, 0,
            0, 3, 0, 0,
            3, 3, 3, 0,
            0, 0, 0, 0,
        }, 4);
        private static readonly Arr pieceL = new(new[] {
            0, 0, 0, 0,
            0, 0, 4, 0,
            4, 4, 4, 0,
            0, 0, 0, 0,
        }, 4);
        private static readonly Arr pieceJ = new(new[] {
            0, 0, 0, 0,
            5, 0, 0, 0,
            5, 5, 5, 0,
            0, 0, 0, 0,
        }, 4);
        private static readonly Arr pieceS = new(new[] {
            0, 0, 0, 0,
            0, 6, 6, 0,
            6, 6, 0, 0,
            0, 0, 0, 0,
        }, 4);
        private static readonly Arr pieceZ = new(new[] {
            0, 0, 0, 0,
            7, 7, 0, 0,
            0, 7, 7, 0,
            0, 0, 0, 0,
        }, 4);

        public static readonly Arr[] PIECES = new[]
        {
            pieceI,
            pieceO,
            pieceT,
            pieceL,
            pieceJ,
            pieceS,
            pieceZ
        };

    }
}
The cell set to zero means an empty cell, otherwise it
indicates the color of the particular cell.
Obviously it is one of these occasions where it is just fine to copy paste the code snippet as there is little learning value in typing this in. We give each piece a name which refers to a letter that vaguely resembles its shape. Finally, the PIECES holds all of them in a single array.
The current piece
Ok, what it takes to put one piece on the board? First we need to check if there is space for it in the desired position, then just blast the non-0 entries into the board. For that we will add two helpers CanPlace and Place to the Arr class.
The former is supposed to return a boolean indicating if it is possible to put the piece into the board at desired position.
 public bool CanPlace(Arr piece, int r, int c)
{
    for (int y = 0; y < piece.Rows; y++)
    {
        for (int x = 0; x < piece.Cols; x++)
        {
            int p = piece[y, x];
            if (p == 0)
            {
                continue;
            }
            int br = r + y;
            int bc = c + x;
            if (br < 0 || br >= rows)
            {
                return false;
            }
            if (bc < 0 || bc >= cols)
            {
                return false;
            }
            if (this[br, bc] != 0)
            {
                return false;
            }
        }
    }
    return true;
}
We make sure that any non-zero value of the piece is within the board bounds and the corresponding value in the board is not occupied.
The latter method simply places the piece on the board, assuming that it has been verified by now that it is possible.
public void Place(Arr piece, int r, int c)
{
    for (int y = 0; y < piece.Rows; y++)
    {
        for (int x = 0; x < piece.Cols; x++)
        {

            int p = piece[y, x];
            if (p != 0)
            {
                this[r + y, c + x] = p;
            }

        }
    }
}
Finally, we need to be able to create a deep clones of the Arr instances. Add this:
public Arr Cloned
{
    get => new(buf, rows);
}
Ok, now we are prepared start putting pieces of the board. Let’s add the following fields into the Engine class which represent what is the current piece in play and what is its position.
public class Engine
{
    //...
    private int curRow;
    private int curCol;
    private Arr curPiece;
    private readonly Random rnd = new();
}
We will need also the random number generator, thus the rnd field. Random lives in the System namespace, so make sure is in your usings.
Now add the Spawn method to our Engine which will responsible for initializing the current piece:
public void Spawn()
{
    int which = rnd.Next(pieces.Length);
    curCol = 4;
    curRow = 0;
    curPiece = PIECES[which].Cloned;
}
In order to access the PIECES array, make sure you have using static Blocks.Pieces; at the top.
Now head back to the PlayScene and add the call to engine.Spawn() inside the Reset method.
 private void Reset()
{
    engine = new();
    // new
    engine.Spawn();
}
In order to display non-empty cells we need to assign colors other than black to all values but 0. Add the following field
    private readonly Color[] palette = new Color[]
    {
        Color.Black,
        Color.Cyan,
        Color.Yellow,
        Color.Purple,
        Color.Orange,
        Color.Blue,
        Color.Green,
        Color.Red,
    };
And tweak the rendering so it grabs the color from the palette instead of always using black.
public void Render(SpriteBatch spriteBatch)
{
    var sx = (VIRTUAL_WIDTH - CELL * BOARD_COLS) / 2;
    var sy = (VIRTUAL_HEIGHT - CELL * (BOARD_ROWS - OVERFLOW)) / 2;
    for (int r = OVERFLOW; r < BOARD_ROWS; r++)
    {
        for (int c = 0; c < BOARD_COLS; c++)
        {
            var rc = new Rectangle(
                sx + c * CELL,
                sy + (r - OVERFLOW) * CELL,
                CELL,
                CELL
            );
            var v = engine.Board[r, c];
            spriteBatch.Draw(App.Instance.Pixel, rc, palette[v]);
        }
    }
}
Ok, this looks like everything we need in order to display at list one piece. But if you run the the app now, the board still seems to be black. How come? Well we spawned a new piece in the engine but haven’t actually placed it on board. Moving the piece one position down will accomplish the goal.
Piece Down
So, what do we need to move the piece down? In the simplest terms, we remove the piece from the current position increase the current row by one and place it again. So firstly, we need a new method in the Arr class which removes the piece in the give position:
public void Remove(Arr piece, int r, int c)
{
    for (int y = 0; y < piece.Rows; y++)
    {
        for (int x = 0; x < piece.Cols; x++)
        {
            if (piece[y, x] != 0)
            {
                this[r + y, c + x] = 0;
            }
        }
    }
}
Good. Now let’s think for a moment. We remove the piece at the current position, increase the row by one and try to put it again. But what to do if there’s no space anymore? obviously the Down operation was not possible in this situation at all! But we removed the piece already, so shall we put it back? looks like a mess. So instead of trying to move down on a real board and do this operation on its clone. If it succeeds we can either copy the whole clone back to the original board or, simpler, just replace the board with the clone. On the other hand, if the operation would fail we could just notify the application that the move is not legit so it can indicate that the game is over or something like that. Let’s add a set only property GameOver which will hold the action to be executed when it is impossible to move.
public class Engine
{
    //...
    // new
    private Action gameOver = () => { };
    public Action GameOver {
         set => gameOver = value;
    }
}
Now we can implement Down as discussed
public void Down()
{
    var clone = board.Cloned;
    clone.Remove(curPiece, curRow, curCol);
    if (clone.CanPlace(curPiece, curRow + 1, curCol))
    {
        curRow++;
        clone.Place(curPiece, curRow, curCol);
        board = clone;
    }
    else
    {
        gameOver();
    }
}
Again,
- make the clone of the board
- remove the piece at the current position in the clone
- increment current row
- if it is possible to place the piece in the new position, place it
- otherwise, indicate the application that the move is not legit, by calling the
GameOveraction.
Let see if it works. Back to the PlayScene, set the engine’s GameOver to something and call Down immediately after Spawn.
private void Reset()
{
    engine = new();
    engine.Spawn();
    engine.GameOver = () =>
    {
        Console.WriteLine("Game Over");
    };
    engine.Down();
}
When you run the application now, one piece should show up. Since we are using the random number generator, every subsequent run will likely yield another piece to show.
Falling Piece
In order to make the piece to fall we need to call Down periodically. Add the following constant to the Constants.cs
public const double NORMAL_DELAY = 0.5;
That indicates how long we normally wait (in seconds) until we need to call Down again.
Add the following fields to the PlayScene
private double baseDelay;
private double curDelay;
private double elapsed;
baseDelay holds the base delay for the current difficulty level. curDelay is the actual delay. At the moment these two will be set to the same value. elapsed tracks how much time passed since the last Down. Initialize delays in the Reset
private void Reset()
{
    // new
    baseDelay = NORMAL_CLOCK;
    curDelay = baseDelay;
    // ...
}
create the method Update which will be called periodically. It has a single argument indicating how much time, in seconds, since the last call.
public void Update(double dt)
{

    elapsed += dt;
    if (elapsed >= curDelay)
    {
        elapsed = 0;
        engine.Down();
    }
}
Monogame asks the Game to update its state by calling the Update method, unsurprisingly.
Let’s create the new field in the App class
private double? clock;
That is the current value of the clock, in seconds.
Override the Update method
protected override void Update(GameTime gameTime)
{
    if (clock.HasValue)
    {
        var updated = gameTime.ElapsedGameTime.TotalSeconds;
        var dt = updated - clock.Value;
        scene.Update(dt);
    }
    else
    {
        clock = gameTime.ElapsedGameTime.TotalSeconds;
    }
}
Easy stuff, we calculate the time difference between the current time and the previous one, and pass that to scene’s Update call.
Run the application again, the piece will fall until it stops at the the bottom of the board. At this point it is not able to move anymore, so the GameOver action will be invoked which, for now, just prints to the console.
Moving the Piece Right and Left
We will want to move the current piece right and left once the right and left keys are pressed, correspondingly. Monogame allows to query the state of the particular key and it will report if the key is pressed or not. So, we can check the state of the left and right keys and if they are pressed, do the corresponding action.
Well, almost.
If you implement it naively this way you will notice that one press will cause usually multiple movements in the corresponding direction. Since the Update is called many times per second it is humanely impossible to ensure that the key press lasted only one cycle.
The way we are going to deal with that is that we are going to invoke the appropriate action only if the key state switched from “not pressed” to “pressed” if both current and previous values are “pressed”, we do nothing.
Let’s create a helper class which will handle that. Name it InputManager
using System;
using System.Collections.Generic;
using Microsoft.Xna.Framework.Input;
namespace Blocks
{
    public class InputManager
    {
        private KeyboardState oldKeys;
        private readonly Dictionary<Keys, Action> discretePresses = new();

        public void Handle(Keys keys, Action action)
        {
            discretePresses[keys] = action;
        }

        public void Reset()
        {
            oldKeys = Keyboard.GetState();
        }

        public void Update(double _)
        {
            var keys = Keyboard.GetState();
            foreach (var key in discretePresses.Keys)
            {
                if (keys.IsKeyDown(key) && !oldKeys.IsKeyDown(key))
                {
                    discretePresses[key]();
                }
            }
            oldKeys = keys;
        }
    }
}
As you see, we essentially maintain the dictionary of keys and corresponding actions to invoke when the key state switched from “not pressed” to “pressed”. To do its job, the InputManager has to be called on every Update. It does not care of how much time elapsed since last call, but for uniformity it will still accept it as a parameter.
Ok, time to implement Left and Right methods in the Engine class
public void Right()
{
    var clone = board.Cloned;
    clone.Remove(curPiece, curRow, curCol);
    if (clone.CanPlace(curPiece, curRow, curCol + 1))
    {
        curCol++;
        clone.Place(curPiece, curRow, curCol);
        board = clone;
    }
}

public void Left()
{
    var clone = board.Cloned;
    clone.Remove(curPiece, curRow, curCol);
    if (clone.CanPlace(curPiece, curRow, curCol - 1))
    {
        curCol--;
        clone.Place(curPiece, curRow, curCol);
        board = clone;
    }
}
Conceptually their implementation is very similar to the Down implementation, modulo that we are moving in horizontal direction, rather than vertical direction. Plus, we don’t bother to notifying the application if it is not possible to move the desired direction.
Now, make sure that we create an instance of the InputManager in the PlayScene and call Update on it.
class PlayScene
{
    // ...
    // new
    private readonly InputManager input = new();
    // ...
    public void Update(double dt)
    {
        // new
        input.Update(dt);
        // ...
    }
}
In the Reset implementation handle the Left and Right keys and delegate to the engine’s Left and Right correspondingly.
private void Reset()
{
    engine = new();
    input.Handle(Keys.Left, () =>
    {
        engine.Left();
    });
    input.Handle(Keys.Right, () =>
    {
        engine.Right();
    });
    engine.Spawn();
    engine.GameOver = () =>
    {
        Console.WriteLine("Game Over");
    };
    engine.Down();
}
Run the app again, you’ll be able to move the piece left and right.
Rotating the Piece
Next we want to rotate the current piece. Let’s say we want to rotate the piece 90 degrees clockwise. The first row of our original piece becomes the last column, the second row becomes the second last column and so on. You see the pattern. Rotation counter-clockwise is pretty much the same, but instead of the first row becoming the last column, it becomes the the column, and so on…
We are going to implement both rotation flavors. Add the following to the Arr implementation
public Arr RotatedClockwise
{
    get
    {
        var dst = new Arr(cols, rows);
        for (int r = 0; r < rows; r++)
        {
            for (int c = 0; c < cols; c++)
            {
                int v = this[r, c];
                int dr = c;
                int dc = rows - 1 - r;
                dst[dr, dc] = v;
            }
        }
        return dst;
    }
}

public Arr RotatedCounterClockwise
{
    get
    {
        var dst = new Arr(cols, rows);
        for (int r = 0; r < rows; r++)
        {
            for (int c = 0; c < cols; c++)
            {
                int v = this[r, c];
                int dr = cols - 1 - c;
                int dc = r;
                dst[dr, dc] = v;
            }
        }
        return dst;
    }
}
Note that we create the new, rotated array. Granted, it is possible to do rotation in place, but we won’t bother here.
Next, let’s implement the Rotate method in the Engine class. Our application could support both clockwise and counter-clockwise rotations by handling different keys, but I decided here to support only counter-clockwise flavor as it seems, subjectively, more natural to me. In the Engine class add
public void Rotate()
{
    var clone = board.Cloned;
    var rotated = curPiece.RotatedCounterClockwise;
    clone.Remove(curPiece, curRow, curCol);
    if (clone.CanPlace(rotated, curRow, curCol))
    {
        curPiece = rotated;
        clone.Place(curPiece, curRow, curCol);
        board = clone;
    }

}
Let’s bind the Rotate to the Up key. in the PlayScene, right below handling Left and Right keys, add
input.Handle(Keys.Up, () =>
{
    engine.Rotate();
});
Dropping the Piece
As the next part of our game we will enable the ability to “Drop” the piece, once the user presses the Space key. We could calculate that position and place the piece there immediately. But that would not be very friendly to the user. So instead we are going to temporarily shorten the delay so it takes way less time for the next Down to be forced.
Add the new constant to the Constants.cs
public const double FAST_DELAY = 0.01;
We want the Space key to make the scene to switch to the FAST_DELAY. Add the corresponding handler to the Reset method.
private void Reset
{
    // ...
    // new
    input.Handle(Keys.Space, () =>
    {
        curDelay = FAST_DELAY;
    });
    // ...
}
That should do it. However, once the piece is dropped, we want to switch back to the “normal” delay, that is to the baseDelay.
add the new action to the Engine class
public class Engine
{
    // ...
    // new
    private Action dropped = () => { };
    public Action Dropped
    {
        set => dropped = value;
    }
}
When the Down does not have place to move, switch from calling the gameOver to dropped. We will handle the game over condition later.
public void Down()
{
    var clone = board.Cloned;
    clone.Remove(curPiece, curRow, curCol);
    if (clone.CanPlace(curPiece, curRow + 1, curCol))
    {
        curRow++;
        clone.Place(curPiece, curRow, curCol);
        board = clone;
    }
    else
    {
        // changed
        dropped();
        Spawn();
    }
}
Naturally, once the piece is dropped we want to spawn a new one.
the last thing is to subscribe to that action and switch the delay back. In the Reset method add
engine.Dropped = () =>
{
   curDelay = baseDelay;
};
Try to run the game. you are able to move the piece left and right, rotate it and drop. The board though fills up as, at the moment we don’t have a way to remove complete lines. So we need to address that next.
Removing Full Lines
First, let’s add a helper function to the Arr.cs which checks if the row is full
public class Arr
{
    //...
    // new
    private bool IsRowFull(int row)
    {
        for (int c = 0; c < cols; ++c)
        {
            if (this[row, c] == 0)
            {
                return false;
            }
        }
        return true;
    }
    //...
}
Next, what it takes to remove the row, in case it is full? We can simply shift all rows above it down and, eventually, fully clear the 0th row. Let’s implement these primitives:
public class Arr
{
    //...
    private void ShiftRow(int row)
    {
        for (int c = 0; c < cols; ++c)
        {
            this[row + 1, c] = this[row, c];
        }
    }

    private void ClearRow(int row)
    {
        for (int c = 0; c < cols; ++c)
        {
            this[row, c] = 0;
        }
    }
}
The last primitive is just a composition of these two
private void RemoveRow(int row)
{
    for (int r = row; r > 0; r--)
    {
        ShiftRow(r - 1);
    }
    ClearRow(0);
}
public int RemoveFullRows()
{
    int removed = 0;
    for (int row = rows - 1; row > 0; row--)
    {
        if (IsRowFull(row))
        {
            RemoveRow(row);
            row++; // need to check the row again
            removed++;
        }
    }

    return removed;
}
We are returning the number of rows actually removed.
Everything is ready to hook this code into the Engine.cs. Modify the Down method so it removes the full rows once it is not able to move the piece down. Like this
public void Down()
{
    var clone = board.Cloned;
    clone.Remove(curPiece, curRow, curCol);
    if (clone.CanPlace(curPiece, curRow + 1, curCol))
    {
        curRow++;
        clone.Place(curPiece, curRow, curCol);
        board = clone;
    }
    else
    {
        dropped();
        board.RemoveFullRows();
        Spawn();
    }
}
If you run the game now, you will notice that the game mechanics is pretty much implemented completely.